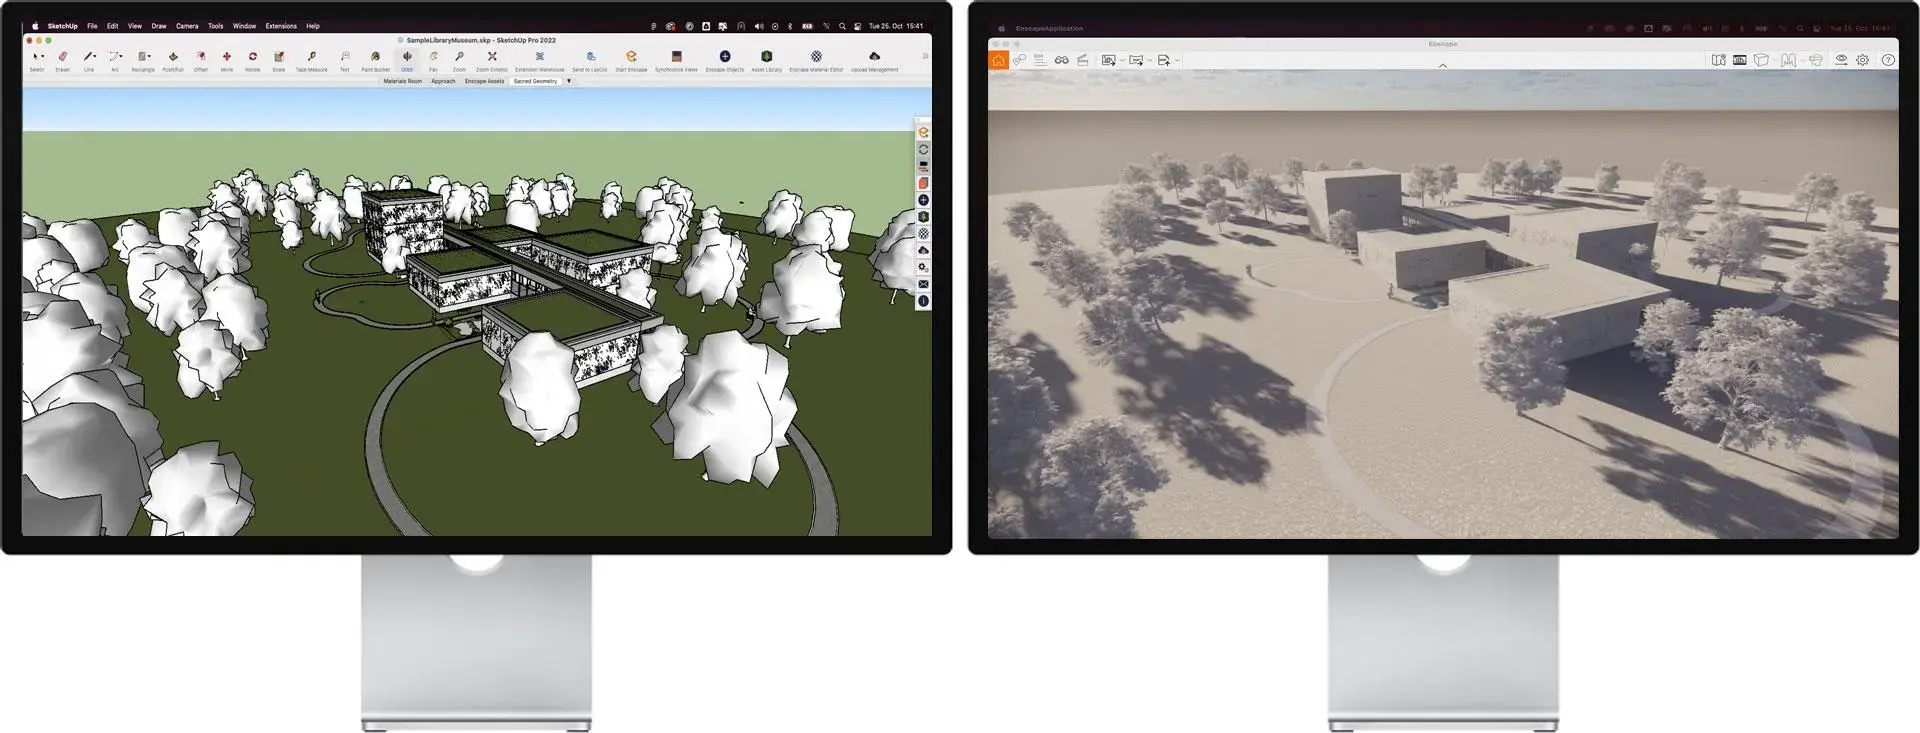


What is V-Ray and Its Role for SketchUp Rendering?
V-Ray is a high-performance rendering engine that transforms 3D models into photorealistic visuals with advanced lighting, textures, and material detailing. It seamlessly integrates with SketchUp modeling, allowing architects and designers to create highly accurate representations of their designs. With features like global illumination, ray tracing, and customizable render settings, V-Ray helps produce stunning visuals that accurately depict real-world materials and lighting conditions.
The true power of V-Ray for SketchUp lies in its ability to enhance both creativity and efficiency. It enables professionals to fine-tune every aspect of a scene, from reflections to shadows, ensuring a realistic and immersive presentation. Whether for client approvals or design evaluations, V-Ray’s precision-driven rendering capabilities make it an essential BIM tool for architectural visualization.

Step-By-Step Process to Download V-Ray for SketchUp
If you are wondering how to download V-Ray for SketchUp, the process is simple. By following these steps, you can quickly set up the software and begin creating high-quality architectural renderings.
-
Visit the Chaos Group Website, the developers of V-Ray. Navigate to the V-Ray for SketchUp section.
-
Ensure compatibility by selecting the V-Ray version that matches your SketchUp edition.
-
Log in to your Chaos Group account or register if you are a new user.
-
Click the download button to get the installer file for your operating system, Windows or macOS.
-
Open the downloaded file and follow the on-screen instructions to install V-Ray.
-
Enter your license details or start a trial version to complete the setup.
-
Open SketchUp, navigate to the extensions panel, and ensure V-Ray is activated for rendering.
Interesting Fact: V-Ray is the rendering tool of choice for 95 of the top 100 architecture firms, helping visualize the world’s tallest skyscrapers, most energy-efficient homes, and the smartest cities across the globe. (Chaos)
How V-Ray Enhances Modeling Capabilities of SketchUp
Integrating SketchUp and V-Ray allows architects and designers to achieve highly detailed and realistic visualizations. V-Ray’s advanced rendering tools push SketchUp’s modeling capabilities further, making it a powerful solution for professionals working on complex designs. Here is how it enhances the workflow.
1. Photorealistic Lighting and Shadows
V-Ray’s advanced lighting system simulates natural and artificial light sources with high precision. Features like global illumination and real-time light adjustments help in how to make realistic render in SketchUp, ensuring depth, soft shadows, and accurate reflections for a true-to-life appearance.
2. Seamless Integration with BIM Workflow
V-Ray complements design with Building Information Modeling by enabling architects to produce high-quality renders directly from their SketchUp models. This helps professionals validate design decisions, present accurate visualizations, and communicate ideas effectively to clients and stakeholders.
3. High-Quality Material Rendering
The ability to create custom textures and materials enhances SketchUp’s visualization capabilities. V-Ray’s material editor supports reflections, transparency, and displacement maps, allowing users to apply realistic finishes to surfaces like wood, metal, and glass with intricate detailing.
4. Adaptive Rendering for Speed
V-Ray optimizes rendering performance with interactive and GPU-accelerated rendering. This ensures faster previews and high-resolution outputs, making it easier for professionals to refine their SketchUp and V-Ray models without long wait times.
5. Realistic Environmental Effects
Features like aerial perspective, fog, and atmospheric effects make renders more immersive. V-Ray allows users to simulate real-world conditions such as mist, smoke, and environmental lighting, enhancing the overall realism of the scene.
Also Read: How to Render in SketchUp: A Complete Guide for Architects & Designers

How to Use V-Ray for SketchUp Rendering
V-Ray is a powerful rendering engine that transforms SketchUp 3D rendering into high-quality visuals with realistic lighting, textures, and effects. Knowing how to render in SketchUp using V-Ray can enhance your presentations and bring your designs to life. Here are some essential steps to achieve professional-grade renders.
1. Set Up Your V-Ray Toolbar
Once installed, V-Ray’s toolbar appears in SketchUp, providing access to essential rendering tools. Familiarize yourself with the asset editor, light settings, and camera controls to streamline your workflow before you begin working on your scene.
2. Apply and Customize Materials
V-Ray’s material editor allows you to refine SketchUp textures by adjusting properties like reflectivity, roughness, and transparency. For realistic surfaces, use high-resolution textures and fine-tune material settings for accurate reflections and depth.
3. Optimize Lighting for Realism
Proper lighting is crucial when you render in SketchUp. V-Ray offers multiple light sources, such as Sunlight, Dome Light, and Artificial Lights, which can be adjusted to mimic different times of day and interior conditions. Experiment with intensity and direction to achieve natural shadows and highlights.
4. Adjust Camera Settings
The right camera angles and exposure settings impact the final render. V-Ray provides options for depth of field, motion blur, and white balance, allowing you to create balanced compositions that enhance the visual storytelling of your architectural design.
5. Fine-Tune Render Settings
V-Ray’s render settings control quality and performance. Adjust parameters like image resolution, noise reduction, and rendering speed to find the right balance between quality and efficiency. Using progressive rendering helps preview changes in real time before finalizing the output.
6. Post-Process with V-Ray Frame Buffer
After rendering, the V-Ray Frame Buffer (VFB) allows color correction, contrast adjustments, and exposure fine-tuning without external editing software. This step helps refine the final image and make necessary enhancements for a polished look.
Also Read: 10 Best SketchUp Plugins for Architects & Designers 2025

Tips and Tricks for Realistic Rendering in SketchUp with V-Ray
Achieving photorealistic visuals in SketchUp 3D rendering requires more than just basic rendering knowledge. By mastering the right techniques, you can create stunning, lifelike images that enhance architectural presentations. Go through some essential tips and tricks that you must know for realistic rendering in SketchUp with V-Ray.
1. Perfect the Lighting Setup
Lighting plays a crucial role in how realistic a render looks. Instead of relying solely on default lighting, combine natural and artificial light sources. V-Ray’s Sun and Sky system can replicate daylight conditions, while Dome Lights and artificial lights help create balanced indoor environments.
2. Leverage Global Illumination for Natural Shadows
Shadows bring depth and realism to renders. Using V-Ray’s Global Illumination (GI) and Ambient Occlusion (AO) improves the accuracy of light bounces, ensuring softer, more natural-looking shadows. This technique is essential in design with BIM for precise lighting analysis in 3D architectural models.
3. Use High-Quality Textures
Low-resolution textures can make even the best designs look unrealistic. To achieve professional results in SketchUp modeling, use high-resolution textures and refine them with V-Ray’s material editor by adjusting properties like reflectivity, bump mapping, and translucency for added depth and detail.
4. Set Realistic Camera Angles
A well-framed shot makes a significant impact on rendering quality. Use V-Ray’s camera settings to adjust exposure, depth of field, and field of view. Mimic real-world photography techniques by slightly tilting the camera to add perspective and balance to your composition.
5. Optimize Reflection and Refraction
Real-world materials interact with light differently. For reflective surfaces like glass, water, and metal, adjust reflection glossiness and Fresnel effects to mimic natural behavior. Properly configured transparency and refraction settings can also enhance glass materials, making them more lifelike.
TABLE OF CONTENTS